Sunday 16 August 2015

Canning tips from me...

Resources


Ball Canning Book: If you get one book, get this one. It has all the basics with clear, easy instructions.

foodinjars.com  This web site has hundreds of recipes for things like jam and pickles, as well as for ways to use them. She has sort of a focus on small batches, so if you wanted to throw together four pints before bed, this is your web site.

pickyourown.org  This web site is just horribly designed. But if there’s a fruit you’d like to can, or something you want to pickle or turn into jam, this site probably has a recipe. Very informative. 


My friend Analisa added: 

The National Center for Home Food Preservation is hosted by University of Georgia. They're the folks who make and change the rules. The list of recipes is comprehensive and completely safe. They also have the only canning safe recipe for lemon curd and it's great. 

Master Food Preservers: like master gardeners except for canning. They have a bunch of great one page food safety type hand outs. 

Mrs Wages is a company making canning products and seasonings. Mrs. Wages is to canning what Betty Crocker is to cakes. All of their recipes are going to call for their seasoning mixes, etc. that said, the recipes and products are safe and reliable. My Aunt and my cousins love it. To me it defeats the reasons I can. http://www.mrswages.com
Canning Across America has more modern recipes and an impressive list of contributors. 

The complete book of home preserving by ball is much more comprehensive than the blue book. It's the joy of cooking for canning. If you want a basic recipe its in there. 
I love the Put 'Em Up books by Sherri Brooks Vinton. In addition to canning recipes that are very modern in flavor combinations she includes recipes for using the canned goods. 
Saving The Season by Kevin West is a touch pedantic and I don't care for his writing style but the recipes are generally good and unique enough that I keep it around. 
Canning for a New Generation by Liana Krissoff is good. 

The blue chair jam by Rachel Saunders came out to wide critical acclaim years ago. It was quickly criticized by food safety experts because she advocates oven canning. The flavor combinations and profiles are interesting but I don't use it as a reference. 


Kara’s tips and tricks:


If you have time to chop fruit, but maybe not time to make jam, you can always macerate it with the sugar in a Ziplock gallon bag in the fridge. It will keep for about a week. You can also add additional flavorings while it macerates.

If you prefer less sweet (or diabetic-friendly or honey-flavored or whatever) jams, try ordering Pomona’s Pectin. Pay careful attention to the directions, because you have to mix the pectin powder with the sugar or sugar substitute first, and boil the jam with a bit of calcium water before adding the sugar, but since I strongly prefer less-sweet jams, it’s a lifesaver. Low-sugar jams are better enjoyed in the first 6 months, rather than the whole year (the color changes, although they don’t become unsafe). 

Some flavors I’ve had a lot of fun playing with include chiles, lavender, vanilla, star anise, lemon verbena, black pepper, cardamom… You do have to worry about the Ph of your jam, but a very small amount of an herb or spice is not likely to change it, so feel free to experiment. You may also have good luck with extracts and liquors. I made, for example, a plum-Madeira jam recently. 

Store jars with the rings off. Also, it’s helpful to label your jars with the date, because they’re best used within a year. Before putting them away, pick each jar up off the counter using just the lid. This will tell you if you have a good seal. 

You can totally make jam with frozen fruit. Trader Joe’s has frozen berries for cheap that are great for this purpose. 

The process for making pickles is very like the jam process. Feel free to experiment with those, too. We’ve had great luck with spicy pickled carrots and beets. 


On safety


If you stick to high acid fruits and pickles the chances of you getting or giving someone botulism is nil. All reported cases of botulism from home canning come from improperly processed meat and low acid veg.

Use wooden, plastic or rubber spoons and spatulas, not metal, as metal can chip or weaken the glass. 

Always check your jars for chips and cracks, especially around the rim. 

Use lids only once (the sealing stuff gets used up), but rings can be reused endlessly.

The USDA says only bottled lemon juice is acceptable for canning, but as long as you aren’t using Meyer lemons, lemon juice from the fruit is probably fine. 

Leaving headspace (a bit of air at the top of the jar) is important. Most jams/jellies will call for 1/4 inch. It helps to create the vacuum seal. You can measure 1/4” easily using the stair-steppy air bubble tool that comes with most canning kits. One stair is 1/4”! 
Use lids only once (the sealing stuff gets used up), but rings can be reused endlessly.


Some surprisingly good recipes!


Pickled cranberries: amazeballs on a sandwich, the pickling brine is great mixed with soda water as a tart drink, and these are lovely in several kinds of cocktails as well. 


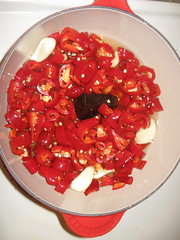
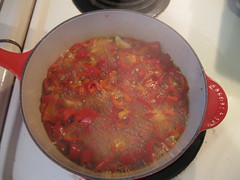
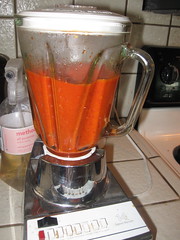
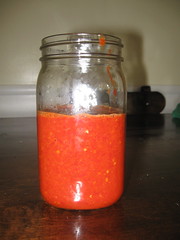
Tomato jam: at first, you go, “tomato jam? Sounds weird.” Then you put some onto good bread with a hunk of sharp cheddar and you go “where have you been all my life, tomato jam?”


Last minute dessert made with a bit of jam. You may have the ingredients on hand. 


PEAR-GINGER CONSERVE


Time: 30 minutes preparation; 50 minutes cooking; 15 minutes processing.
4 Lbs. ripe pears, peeled and chopped (about 9 C)
3 C. sugar
½ C. lemon juice
4 tsp. grated lemon zest (no white pith)
¼ C minced crystallized (or candied) ginger
1 cinnamon stick

Prepare 6 half-pint canning jars (run them through the dishwasher and leave them in the hot machine, or wash the jars in hot soapy water, rinse, and hold in hot clear water)
Time: 30 minutes preparation; 50 minutes cooking; 15 minutes processing.

Combine pears with remaining ingredients in large saucepot. Cook, stirring frequently, until sugar dissolves. Cook rapidly until thick, stirring to prevent sticking, about 30 minutes. Mixture will mound up on spoon. Remove cinnamon stick.

Pour into prepared jars, seal, and process:

* Fill jars with hot mixture, leaving ¼ inch headspace between the top of food and lid
* Run a wooden spoon around the jar between the food and the glass to release any trapped air bubbles.
* Wipe the rim clean. Place lid on jar and screw bands securely, but don’t use force.
* Place the jars in a large stockpot or canning pot, leaving enough space between jars for water to circulate.
* Add boiling water to cover jars by 2”. Return to a full boil.
* Cover pot and process for fifteen minutes.
* Carefully remove jars with tongs or jar lifter and allow to cool.


Many thanks to my friend Analisa, who helped me put this together. 


Sunday 2 June 2013

You can become a yogurt proselytizer, too!

I find myself, over the last year or so, having this conversation a lot:

Neighbor/friend: I just love Greek yogurt! We eat a ton of it. I feed it to my kid. But it's so expensive! Other neighbor/friend: It's not too bad at Trader Joe's. We go through tons of it, too. Me (biting my lip trying SO hard not to sound like a cultist): I started making my own, and it's way cheaper and really good, and not hard or time-consuming at all.

Here's the deal. Elsewhere on the web, there are lots of recipes for homemade yogurt. One uses a Crock pot, which sounds easy, but my Crock pot is a newer model that gets too hot, and I didn't like the yogurt I made that way AT ALL. Others use powdered milk as an additive to make the yogurt thicker, and I thought it made the yogurt have a weird texture. Some recipes use the oven light to keep the yogurt warm, but my oven has a short, and it makes lightbulbs explode (I realize I should probably address that).

Anyway, it took some trial and error (lots of error) to find an easy, consistent way to make great yogurt, but now that I've done it, you can take advantage of it. And it's basically no harder than heat, cool, mix, pour, wait.

Ingredients: 1/2 gallon milk (I use organic 2%) 1/2 cup yogurt with live cultures (I use Fage to start*)

You will also need a large saucepan, a thermometer, two quart-sized containers (I use glass jars, but Tupperware or whatever you have works), an insulated bag, and one more unlikely-to-melt container. Plus spoons and junk. A funnel is nice, but not necessary.

First, pour the milk into the saucepan and heat it over medium heat, stirring occasionally, until it reaches 180 degrees. Take it off the burner.

Second, wait.** Boil some water while you're waiting. For real.

Third, when it has cooled down to about 110 degrees, pour some of the warm milk into a bowl with the 1/2 yogurt and mix them together. Then pour that mixture into the pan of warm milk. Now, pour all that milk-with-yogurt-mixed-in into your jars or Tupperware and close them up. Put them in the insulated bag.

Fourth, pour the boiling water in the non-melty container, seal it up, and add it to the insulated bag, too.

Fifth, wait some more. Between 7 and 10 hours, I'd say. Overnight is probably fine. The deal is, it's not so sour and yogurt-y at seven hours, but it's thin. At ten hours, it's thick and Greek-y, but it's pretty sour, too. I prefer thick and sour, so I usually let it go ten. You can always check yours and see.

When it's ready, just throw the jars in the fridge. I've seen it recommended that you whisk them rapidly before doing so, but in my experience, it doesn't make a damn bit of difference.

Now here's how it rolls out financially: I spent $3.89 on milk and got two quarts of yogurt. (See the notes below for why I'm not including the price of the Fage.) That's approximately the same as 3 1/2 500 gram containers of Fage, which costs about $5. So that's a steal if you're buying bulk containers of yogurt, and the single-serving yogurts are about the same (18 bucks).

Sure, I put a little work in, but the truth is, even with washing the dishes, my total time contribution was less than ten minutes (pour, stir, mix, pour, put in bag, take out of bag).

Now if you're really into your yogurt being thick, Greek-style yogurt that you can cut into like custard, this is probably not quite it (it's almost it), but you can drain it (in a clean cloth dish towel over a bowl) to make it thicker if you really want.

And now for my serving suggestions! Add some honey, maple syrup, or jam. Add some granola or Kashi cereal. Add cucumber, salt, garlic and dill for tzaziki! Use in place of sour cream on taco night. Throw in fresh or canned fruit. I eat yogurt as my snack almost every single day (two quarts lasts about two weeks for me), and I never get bored, because one day, I'll throw in raspberry jam, and the next it'll be maple syrup and Kashi, the third day I'll put in a diced canned pear, and they'll taste like completely different snacks.

If I've convinced you and you try it, just beware of social gatherings, because you're going to want to spread this news like the clap.

*I use Fage the first time I make a batch, then the next three or four batches, I just use my own leftover yogurt to start the new batch. (That's what you're seeing in the pictures.) Then I'll start with Fage again, just to make sure the cultures are still, you know, live and active.

**If you have limited time and don't want to wait (depending on how hot your house is, it seems like this takes most of an hour), you can speed it up. Stop up the sink with a drain-pluggy-thing. Dump a bunch of ice in. Run the water so it's three or four inches deep. Put the saucepan in the water bath, stir it, and watch the temperature closely, because it has a tendency to drop really fast. When it gets to 110 degrees, proceed with the next step in the recipe.

Edamame and sweet rice with salty seeds

If you've read this blog before (and I know I haven't posted anything in a year -- oops!), you know that if anything, I'm thrifty. With money, obviously, but also with time and effort. I like to make cool stuff, but not for a bunch of money or if it takes a long time or dirties every dish in the house (my husband would argue that everything I make dirties every dish in the house, but he is wrong).

But, you know, then other times you just fall in love with the sound of a recipe and throw caution to the wind. This was one of those times. I saw the words "edamame" and "sweet rice" and "salty seeds" and I was like, "YES. Put that in my face!"

And then I looked at the ingredients and went, "ugh, okay." And the resulting dish was delicious and everything, but you know when someone builds a Rube Goldberg device to remove the stuffing from an Oreo and you're like... cool, but I just scrape it off with the other half of the chocolate cookie? This recipe was like that.

First, let's look at the cost.

It happened that I already had almost half the ingredients, and I substituted some of the others (onion instead of shallot, an actual pickled plum instead of plum vinegar, brown sesame seeds for white), but I still had to purchase...

...cumin, fennel, coriander, chia, sticky rice, brown rice miso, pumpkin seeds, kosher salt (normally I would have this, but I was out), shelled edamame and ginger.

So I thought the smart choice was to go to the co-op, where many of those seeds are available in bulk bins, where they are a few cents each, rather than $4 per jar.  Plus, I know they have miso and chia and some of that other hippie crap.

The seeds were mostly not that much money, but the chia seeds were only available in a big bag which was (drumroll please) $10! Holy ass! I asked an employee for help, because I was like, seriously, what?!

The sticky rice was $5 for a bag that would make one recipe.

The miso was about $7.

The salt was a couple bucks... no big.

I actually went to another store for the edamame and ginger.

In total, I spent over $30, and I started with a fairly well-stocked pantry. The thing is, the dish was delicious. I'd be happy to have it like twice a week. It's just that I'd be in the poorhouse before long if I did.

If I had it to do over again with what I had in my pantry, I'd use the white miso I tend to keep around.

The chia seeds were nice, but if you want a crunchy, nutty little seed, go for poppy. They can be had in bulk, too, and pretty much would not change the nature of the dish.

I'd use table salt instead of kosher.

If I didn't have miso at all, I'd buy a small amount of miso from a bulk bin.

And there's a $25 reduction.

Furthermore, I think this would be lovely with short-grain brown rice instead of the sweet rice. If you are really devoted to the sweet rice thing, go to the Asian food store nearest you.

Finally, I don't know why the hell you'd microwave the rice. I have a rice cooker. It works very well, and I don't have to tend it every two minutes. Also, rice can be cooked in a pan on the stove with little trouble. It can even be baked. Basically, find a method that does not involve you taking something out of the microwave and stirring it every two minutes.

Oh, and if you looked at the recipe and saw "salad" and then were confused about the eating it hot part, so was I. I think you could make this ahead and eat it cold, but we ate it hot and it was very tasty.

So if you want to make that stuff, print the original link and make these changes:

Cross out chia and write poppy
Cross out sticky rice and write short-grain brown rice
Cross out kosher salt and write table salt
Cross out umeboshi plum vinegar (unless you happen to have that)
Cross out brown rice miso and write miso.
Cross out "white" in front of sesame seeds.

Put an asterisk next to #3 in the instructions that means "optional."

For #5 and #6, cross the whole thing out and write "cook the rice." That way, you can do whatever the hell you want.

As Thoreau says, "simplify, simplify, simplify."

This was some bomb-ass rice, and I'm planning to make it again soon (I might as well; I have like 3 pounds of chia seeds left), but sometimes we just need to make our lives easier, you know?

Now go and cook and enjoy.


Saturday 2 June 2012

Chevre if you're Frenchy, goat cheese if you're a hillbilly like me

Guys, I have to share this with you: making goat cheese is SO EASY I have no idea why everyone doesn't do it. I mean, unless they don't like goat cheese or whatever. Here is my goat cheese photo-essay.

IMG_2483
Step one: Buy goat milk. (Make sure it doesn't say "ultra-patsteurized.")

IMG_2485
Step two: Pour it in a pan and turn it on a low-ish heat setting (I have an electric stove and chose about 3 1/2).  Stir it once in a while, but don't stand over it or anything.

Monday 14 May 2012

Some advice

I will probably get back to this blog when I have more time in the summer again. I've been making some really interesting canned stuff -- jams and pickles. In the meantime, I was thinking what one thing I'd like to tell my daughter about cooking if, for some reason, I could only tell her one thing. I think it would be this:

Find good recipes and use them exactly until you have such a good handle on the techniques that you don't need them anymore. Then, for god's sake, throw them away and start making up your own! But never forget to check out what the other innovators are doing and see if you can incorporate that into your repertoire, too.  And once in a while, go back and do something old-fashioned and simple to remind yourself how good it can be*. (Incidentally, this advice probably also applies to playing any kind of music, making any kind of art, writing, dancing, and probably the sciences, although I am not as familiar with that oeuvre.)

*For every molten-lava-chocolate-chipotle-salted-brownie out there, there is nothing like a slice of Mom's bundt cake. Or cherry pie. Or oatmeal chocolate chip cookie.

Tuesday 22 November 2011

On canning

Sorry I've been so absent. Busy, as usual. Instead of a recipe today, here are the top five things I like about canning.

1: You have an abundance of something, and you can TOTALLY keep it. Bought a bunch of stonefruit at the farmer's market and then realized you can't eat it all? My nectarine-plum jam from last year was one of the best I've ever made, and it was completely that kind of situation. I saw blackberries for a ridiculously low price at Costco this weekend, and instead of thinking "Aw, I'll never be able to eat all those before they go bad," I thought "Jam!" And then there was jam, and it was good, and we'll be able to have in when no blackberries are in season.

2: You can make stuff the way you like it. I, for instance, really prefer my jams less sweet, more chunky and seedy, and a little rustic, I guess. I have no love at all for Smuckers. I want my fruit to taste like fruit. And when you can your own, you can make it exactly like you want it. If that is sweet and seedless and sticky, have fun!

3: You're free to experiment. Late summer/early fall this year, I bought 40 pounds of plums. I then proceeded to make black-pepper plum jam, thai chile plum jam, much hotter Thai chile plum jam, cinnamon plum jam, ginger plum jam, star anise plum jam, and plain old plum jam. Because why not? I have also tried strawberry vanilla, blackberry honey, and pear ginger. I've made pickles with far more chiles than the recipe called for, because that's how we like them. As long as you know the basics of how much acid you need, it's really no big deal to mess around a little. If you have a pectin that you can use with no-sugar recipes, experiment with Splenda, with Stevia, with honey, with less sugar. I'm going to make a special batch of something for my diabetic aunt this year. 'Cause I totally can.

4: It's cheaper (sometimes). I think I ended up making eight batches of plum jam. I spent $20 on the plums, and I probably spent $20 on the jars (because I am not very good at keeping track of jars, and I give them away and always need new ones). If you figure about five half-pints per batch, that's a dollar per jar. I also save megabucks on pickles. My husband loves pickles, and we had to buy at least a jar every three weeks, and our favorite ones were about $6 a jar. I bought 10 pounds of cucumbers for $5 and made pickles with them, some sugar, some salt, and some cider vinegar. It was easy and very cheap. I also had big jars already, so my only expense was a pack of lids, which runs a couple bucks. There are exceptions, of course. If you're buying blackberries at $3 a pint and you need six pints to make a small batch, you're not saving any money. On the other hand, if you think of the fancy jams from twee little gift shops, you may still be saving compared to those.

5: It's nostalgic for me. Maybe this isn't true for you, but my grandmother was a canner. I'd go over and there would be jars sitting upside down on towels on the counter and her little kitchen would be filled with steam. In the winter, I would crack open a jar of apricot halves, and their smell, their texture, and their sweet syrup would entice me. I sometimes ate a whole jar in a sitting. She also made jams and jellies, and I've rarely if ever had better. Today I posted on Facebook about making apple butter, and my cousin pleaded with me to tell her it wasn't like Grandma's, because her mouth was watering. But it is. It's deep brown and has more cinnamon that most people probably use, and I used a nice tart apple, and it's divine. And it's like childhood came back for a second.

Bonus: Pickled carrots. These combine numbers 2-5. I'm a recent convert to pickled carrots, and I am insane in the membrane for them. But the ones in the store cost a lot more than my homemade version. Plus, they are often softer than I like. Plus, they sometimes come with other stuff I don't want, like onions or cauliflower. Plus, I like them nice and spicy, with lots of jalapenos! Plus, I'm going to try them with garlic next time. I'm not one to say that you can make absolutely anything you've tried and liked, but frankly, if it's something in a jar, I'm willing to bet you can (ouch, pun attack!).

Saturday 25 June 2011

Try making your own condiments: Sriracha aka Rooster Sauce aka Hot Cock

There's something pretty special about inviting people over and being like "would you like some homemade chipotle catsup for your burger?" Or giving a new neighbor a jar of strawberry marmalade. Or serving up your own relish on hot dog night.

My husband's favorite condiment of all time is Sriracha, which is a vinegary and VERY HOT asian chile sauce. And he's not alone; there are web comics devoted to the stuff, and I've even seen a sriracha tattoo. As last weekend was Fathers Day, I decided to make him some.

Unlike many recipes, which I make a lot of changes to, I followed this one to the letter.

I soaked the vinegar, chiles, and garlic overnight in the fridge in a big jar. The vinegar didn't quite cover everything, so I shook it up once in a while.

Then I threw them in a pot to cook.
IMG_3367

I added palm sugar, which was hard to find, because at my Asian market, they apparently don't believe in having all the sugar together.
IMG_3368

I cooked it according to the instructions, and the sugar added a dark molasses-y color. I'm not sure the flavor was that much different than brown sugar, but now that I have it, I'll use it next time I make sriracha. Might as well.
IMG_3369

Then I pretty much blended it up.
IMG_3370

And threw it in a jar.
IMG_3371

Sorry for such a super-fast post, but it was easy as pie!

Some notes would be that this is a touch sweeter and significantly less hot than the kind from the store. I personally can only use a few dots of that stuff, but I spread the homemade kind in a thin layer over a piece of toast with hummus. Your mileage may vary, though, as sometimes the peppers you buy are hotter than others.

Good luck and happy cooking!