Saturday 25 June 2011

Try making your own condiments: Sriracha aka Rooster Sauce aka Hot Cock

There's something pretty special about inviting people over and being like "would you like some homemade chipotle catsup for your burger?" Or giving a new neighbor a jar of strawberry marmalade. Or serving up your own relish on hot dog night.

My husband's favorite condiment of all time is Sriracha, which is a vinegary and VERY HOT asian chile sauce. And he's not alone; there are web comics devoted to the stuff, and I've even seen a sriracha tattoo. As last weekend was Fathers Day, I decided to make him some.

Unlike many recipes, which I make a lot of changes to, I followed this one to the letter.

I soaked the vinegar, chiles, and garlic overnight in the fridge in a big jar. The vinegar didn't quite cover everything, so I shook it up once in a while.

Then I threw them in a pot to cook.
IMG_3367

I added palm sugar, which was hard to find, because at my Asian market, they apparently don't believe in having all the sugar together.
IMG_3368

I cooked it according to the instructions, and the sugar added a dark molasses-y color. I'm not sure the flavor was that much different than brown sugar, but now that I have it, I'll use it next time I make sriracha. Might as well.
IMG_3369

Then I pretty much blended it up.
IMG_3370

And threw it in a jar.
IMG_3371

Sorry for such a super-fast post, but it was easy as pie!

Some notes would be that this is a touch sweeter and significantly less hot than the kind from the store. I personally can only use a few dots of that stuff, but I spread the homemade kind in a thin layer over a piece of toast with hummus. Your mileage may vary, though, as sometimes the peppers you buy are hotter than others.

Good luck and happy cooking!

Tuesday 14 June 2011

Get to know a tool: the mandoline. Also, summer squash "noodles."

A confession: most of these treats I make are just that -- treats. I try to be careful about my diet, and just as an example, the day that I knew I was going to eat some of that cake (along with other party nibbles), I ate almost nothing besides fruits, veggies, and scrambled egg whites all day. Today's post is far more fat-conscious than most. Just a heads-up.

I absolutely love eating out, and I have been hearing about a new sandwich place in town. I have shortened days this week, so today I picked up my daughter and we went to lunch. I had a beer-poached fig and goat cheese sandwich, followed by a Thai tea and sweet potato popsicle. So I knew I needed a light dinner.

Now, you can totally make "noodles"* with a vegetable peeler (just keep peeling down the length of the squash until there is no more to peel!), but I like the texture of these very thin, square strips I can make with my mandoline.

Technically, mine is called a "v-slicer," as most mandolines have just one straight blade. I had one of those for years, and it finally got really dull, so I asked my mom to pick this up at Sur la Table (woo-woo!). It has three plates you can slide in. One is just for slices, and it is adjustable from very thin to pretty thick. I used it on the thinnest setting to slice some jicama on Mothers' Day, and it was practically see-through and adhered to the bowl. It's great for things like cucumbers for sunomono or anything that says "shaved." Later this week, I'm thinking of pickling some carrots, so I'll probably use a thicker setting for those.

The other two plates have a bunch of vertical blades, so that you can either create long strips or a fine dice. I used the wider one to cut long strips of veggies for snacking.
IMG_3356
IMG_3357

And today I used the thin blade attachment. I'll show you what I did!

Zucchini "noodles" with feta and tomatoes

2 zucchini
2 cloves garlic
2 tomatoes
2 tsp capers
1/4 cup crumbled feta
fresh ground pepper, to taste

Get a large pot of well-salted water boiling. Cut the zucchini into super-thin slices, either with a vegetable peeler, a mandoline, or by hand if you're a badass.
IMG_3359

Drop the zucchini into the water and let cook for two minutes. Drain.

Chop garlic finely and put into a large serving bowl. Chop tomatoes into about a 1/2 inch dice and add them to the bowl. Add the capers and feta. Then put in the "noodles." Mix well and top with the pepper.

IMG_3362

You can make lots of changes, of course. I actually really like olives in a dish like this, I just didn't have any. You could add a little olive oil, leave out the capers, or add something else you like. If you're really into salt, you could add some, but the feta is plenty salty for me. If this isn't filling, you could mix it half and half with real pasta, and it would cut down on the calories, too.

I recommend using a good feta, as I've gotten spoiled and inferior fetas make me sad now.

Not that it matters to me, but it's also gluten-free.

A couple notes on the mandoline/slicer: it's great for all kinds of things, like scalloped potatoes, crudite trays, chips, veggies for sushi... I use it almost as much as I use my food processor or Kitchen-Aid stand mixer, which are some serious staples in my house (I'll probably devote posts to them later). If you're a bit clumsy with a knife and end up with uneven slices, this thing is a lifesaver. But I do have a word of caution: it is SHARP. For serious. Like, I cut my hand on it and barely felt it, but it opened my hand right up. You should always use the guard thing that comes with it, and even then, be careful not to lean the heel of your hand too far back. Keep your hands FAR from the blades of this thing. The flat cutting panel has a safe setting for washing, but the others don't -- because they are not safe! Be careful out there. Oh, and for the record, my model is by Borner. It's made in Germany, so its warnings about using the guard start with ACHTUNG! Also, I just looked it up on Amazon (as always, I'm not getting paid or anything), and all the "related items" are cut-resistant gloves. So there.

*I have been careful to call these "noodles" rather than noodles, as the first time I made them, I called the dish "summer squash fettucini," which made my husband think there were actual pasta noodles involved. He was disappointed.

Monday 6 June 2011

Perfect something: German's chocolate cake

First note: I realize it is pretty fussy to refer to it as "German's" rather than "German," and I swear I don't even do it when talking, but in print, it just looks wrong to me. It was developed by a dude named German, not a dude from Germany. So there you are.

In the Goodest Cooker's kitchen, I often try new recipes. I love, especially, to have some reason to look up a new recipe and try it out. I also love to improvise. But there is a special, gooey feeling I get inside when I know that I make something REALLY well, and that people look forward to seeing me with MY oatmeal chocolate chip cookies or some such. And the only way to do that is through practice.

So pick something, anything, and make it enough times to get really good at it.

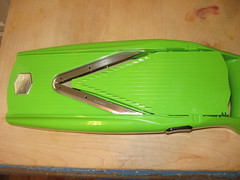
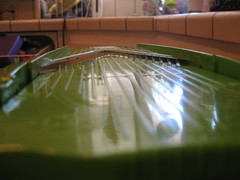
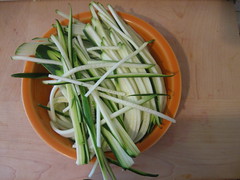
The thing about this cake is that it's a fairly simple recipe, and it even comes on the box of chocolate. But having made it so many times (I'm guessing about twenty, give or take a few), I have little tips and tricks, and I know what worked and didn't. For example, the flake coconut is way better than shredded coconut. And pecan halves are cheaper than chopped, but it's really important that the chunks aren't too big, so I use a chopper.
IMG_3299

It's mainly about following the recipe, but I follow it really carefully.

And here it is:

German's chocolate cake

2 1/2 cups cake flour
1 teaspoon baking soda
1/2 teaspoon salt
1 bar Baker's German sweet chocolate
1/2 cup boiling water
1 cup butter or margarine
2 cups sugar
2 egg yolks, unbeaten
4 egg white, beaten stiff
1 teaspoon vanilla
1 cup buttermilk

Sift first three ingredients. Melt chocolate in water -- cool.

Cream butter and sugar until fluffy. Add egg yolks, one at a time, beating well after each. Mix in chocolate and vanilla. Add flour mixture alternately with buttermilk. Fold in beaten egg whites.

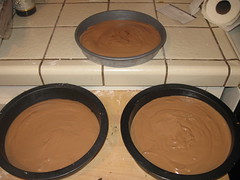
Pour into three 8 or 9 inch layer pans lined on the bottom with wax paper. Bake at 350 degrees for 30-40 minutes.

IMG_3295

Coconut-pecan frosting

4 egg yolks
1 can evaporated milk
1 1/2 teaspoon vanilla
1 1/2 cups sugar
3/4 cup butter or margarine
1 package (7 oz) angel flake coconut
1 1/2 cups chopped pecans

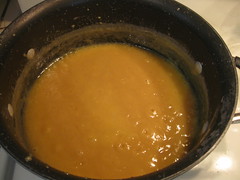
Beat egg yolks, milk and vanilla in a large saucepan with a whisk until well blended. Add butter and sugar and cook over medium heat 12 minutes or until thickened and golden brown, stirring constantly. Remove from heat. Add coconut and pecans. Mix well, then cool.

So here are my thoughts, tips, tricks, etc.

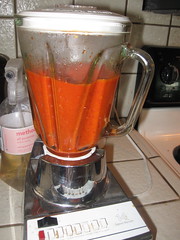
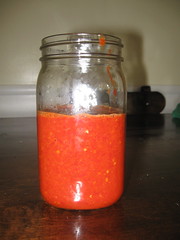
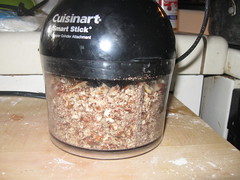
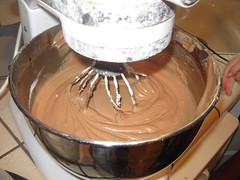
I am gadget-friendly. I make the batter in a Kitchen-Aid mixer, whip the eggs with an immersion blender, and chop the nuts using the same blender with a different attachment. Can you do it all with whisks and spoons? I supposed, but if you have some technology, it's going to make it a lot easier.
IMG_3294

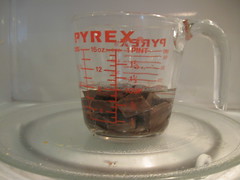
To melt the chocolate, I break it up into small chunks and drop it in a big Pyrex measuring cup with the water. Then I nuke it for 2 minutes. Stir it with a fork, and it's perfect.
IMG_3290

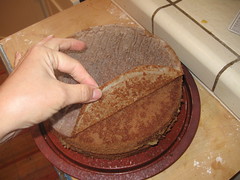
I used parchment paper instead of wax paper. I recommend you use SOMETHING, though, as these cakes tend to stick, and when they stick too much, they can fall apart.
IMG_3304

If you use Air-bake cake pans (or any other brand that has the double-layer walls), these will take the full 40 minutes. Test them to see if they're done by poking a knife into them.)

When it says to fold in the egg whites, that means don't mix it too much, just gently. Sort of stir up the batter from the bottom of the bowl, stir it a few more times until the white is mostly incorporated, and you're good. The egg whites are holding air bubbles, which helps make your cake super-fluffy. If you stir the heck out of it, you'll break all those bubbles.

I can be a little cheap and shortcutty, but not with this recipe. I use butter instead of margarine. I spring for Softasilk cake flour. I do all the steps, including adding the flour and buttermilk alternately. I don't even know what that bit is for, but I do it. I'm much more comfortable improvising when it comes to dinner. Baking is like science.

When the frosting is "thickened," you'll notice that it sticks to the back of the spoon. You could run your finger through the frosting there and it would leave a clear line.
IMG_3303

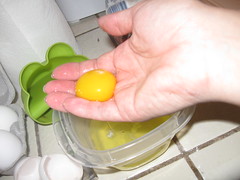
Although I mentioned I love gadgets, there are a lot of things I can do without, like egg separators. Step 1: crack egg. Step 2: pour it into your hand. Step 3: open your fingers a little. Egg separated.
IMG_3298

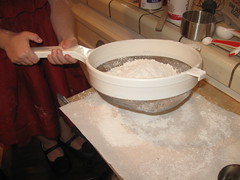
I don't sift, exactly. I use a big fine-mesh strainer thing. I used a sifter when I was a kid and all it ever did was give me hand cramps. This thing works as well and faster. Dump all your dry ingredients in, then give it a few shakes.
IMG_3289
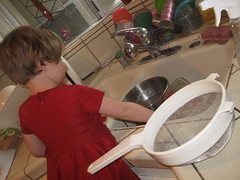
So easy a toddler could do it (with enormous amounts of supervision).


Get yourself a scullery maid to do the dishes.
IMG_3297

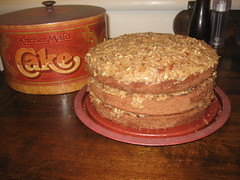
And a few more thoughts. My mom's frosting recipe was the same as the one on the box, but made about 25% less in volume. I like the larger quantity, because then you can really spread the frosting thickly between the layers. Sometimes I stretch it to cover the whole outside, but mostly I like it like this -- frosted between the layers and on top, but with bare sides. I have been to cafes where they have a chocolate ganache on the sides. This is heresy and it must be stopped.

Here is my cake. Now be careful, because it's really delicious. It's not pretty, though.

IMG_3307